Growing up, my favorite season was winter.
Because you don't do yardwork {rhymes with "hard work"!} in the driving snow.Yardwork in my parents' humongous yard was an occasional punishment, a frequent chore, and a habitual family project. Usually, sister #2 and I were assigned a joint task and Little Houdini would reliably disappear and leave all the fun for me. Manhandling the lawnmower up the steep back hill meant risking life and limb as the beast came bearing back down the slope, blades whirling. Weeding the raspberries yielded numerous centipedes. {Ickity ick!} I loathed every minute of it.
As I grew older, I slooowly came to appreciate just what my mother saw in her frontyard forays. She taught me the names of the flowering plants and herbs, which ones were perennials, which ones would attract hummingbirds and honeybees, what made pasta sauce taste better, and why amending soil for roses and vegetables were different processes. For my mother, her yard and gardens are simply another room of her home.
In college, I worked at a pet/feed/garden/seed store, and I made frequent references to the western
Gardener's Bible as I peddled petunias, radish seed, and fertilizer. As I learned more about the curious serenity found in seedlings and hard work, I began to change my tune.
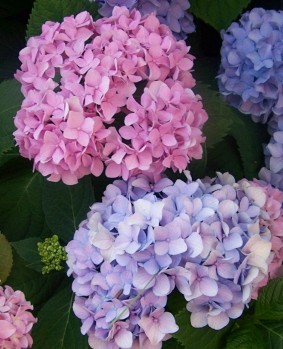
When Hubby Love and I moved into our first apartment, I tried my hand at a few projects. Tulip bulbs went into the tiny patch of dirt by the front door. Terra cotta pots of annuals were tended and doted on. Hydrangeas were ruthlessly cultivated despite the fact that semi-arid Denver is most definitely not their growth zone.
When we decided to buy our first home, I pored over books on how to instill "curb appeal" into the upcoming investment. Together, we planned what sort of delights we would plant in our garden. We wanted a yard that reflected well on us--relaxed, low-maintenance, and dang good-looking. So I was not exactly over the moon when our budget and our list of home requirements combined to land us this little gem:
 Oh, and the previous owner decided to stop watering that teensy patch of green and the scrawny oak twig once we were under contract.
Our first big project as homeowners was to spruce up the yard, and there was really nowhere to go but up. Every time we trekked to Home Depot, I holed up in the book section while Bart went off to find the right tool or part. This volume proved to be a great resource for the fledgling do-it-yourselfers, and coupled with my yard inspiration file, we got some great ideas.

Hardscaping {landscaping with stone} is definitely do-able, but we left ourselves a full weekend to tackle the project. I started by marking out a rough outline of the planned pathway with a garden hose. When it looked about right, we spray-painted the outline on the grass and began digging out sod by hand. {Remember to call your electric company to map out gas and power lines before digging.}

The foundation needed to be at least 8-12 inches deep because of our cold winters, or the path would heave up and be uneven after a few seasons. We removed the excavated dirt to our backyard garden patch...One. Wheelbarrow. At. A Time.

Because our soil is so hard and compacted {Bentonite clay}, Bart used a garden tiller to rough up sections for easier excavation.

After reaching the necessary depth, we tamped down the soil to make sure it was packed firm for a solid foundation. {You can see that just a few weeks of sprinkler therapy from us had revived the little bit of remaining lawn, and the oak twig resurrected to sprout a few leaves.}

We laid down a layer of coarse, gumball-sized gravel. The base layer provides drainage space for the upper layers. {It was also a handy way to get rid of the ugly white quartz landscaping rock the previous owner had piled under the front deck.}


A trip to our local garden supply mecca yielded a 1/2 ton of pea-sized gravel, which made up the next layer. {More drainage, plus it filled in the gaps around the larger gravel.}

A second trip to the garden center, and we purchased a ton of sand. This is the support layer for the stone we would be laying, so after filling in the sand, we wet and tamped it several times to firm it down.


Our final garden center purchase for the day yielded flagstone. {You can purchase different colors from gray to tan to red, depending on where you live and what region the stone is from.} The stones come in large slabs, and we began laying them out like puzzle pieces, getting a rough fit.

Using a large iron spike with a chisel tip {you can get them at Home Depot or Lowe's}, we trimmed and manhandled the larger slabs into more manageable, better-fitting pieces.

Littler stone pieces filled in the gaps, and then we poured the remaining sand over everything and swept it between the stones with a large push broom to fill it in. If your path's foundation is well-packed, the sand will settle firmly between the stones and you don't need to mortar them in place. We do plan on sprinkling down a maintenance layer of sand every few summers, just because it erodes a bit.

More spraying to firm everything into place.

And...voila!

This shot is from the following summer, after our lawn revived further. We dug two small flower beds while we were tearing up our dead sod and laying the path. I had read about xeriscaping, and after tilling and amending the soil, we planted these beds with drought-tolerant plants. Grass is fairly water-hungry, so our long-term goal is to include more self-reliant, less thirsty plantings while still cultivating beautiful plants with color and scent.  I think my 12-year-old self would be shocked that I've finally untertaken--even embraced--the hard work of yardwork.
 Buggy ride ~ August 2007
 Spudnuts rising ~ October 2008
 Spudnuts ~ October 2008


